So, instead, I tortured myself with sewing more hexies.
Here is the top, sandwiched, quilted and the batting trimmed.
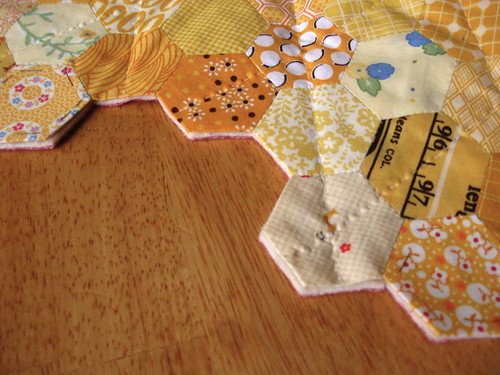
Then I made another 76 hexies for the border on the back.

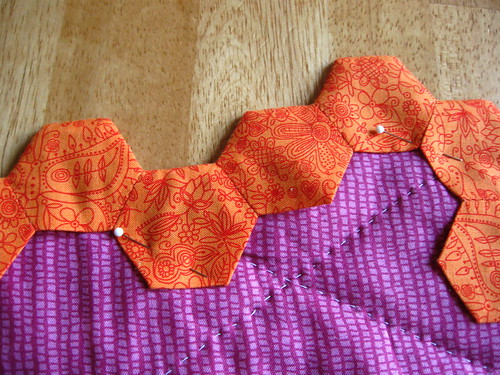
I whipstiched them together to mirror the edge of my quilt...
...and then whipstitched the edge hexies to the quilt top hexies all around the border.
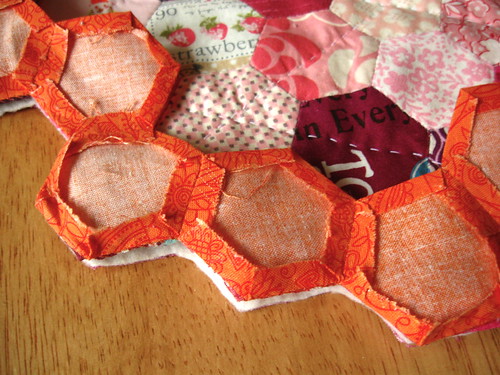
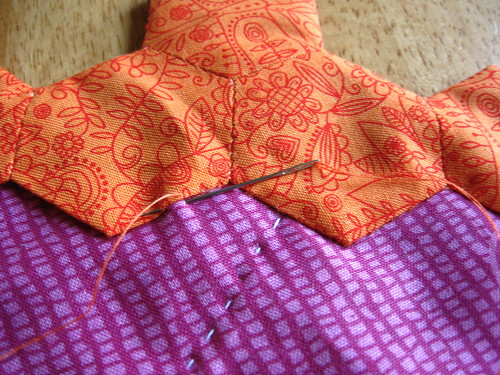
The next step is important: I heavily starched and ironed all of the border hexies. And then I took out the threads and papers and flipped the border over to the back.
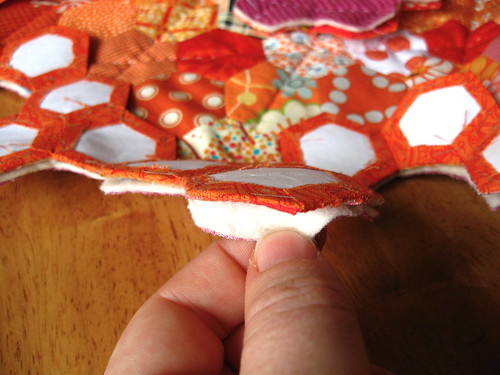
I carefully poked out all of corners and ironed it again and then pinned the edge hexies to the back of the quilt.
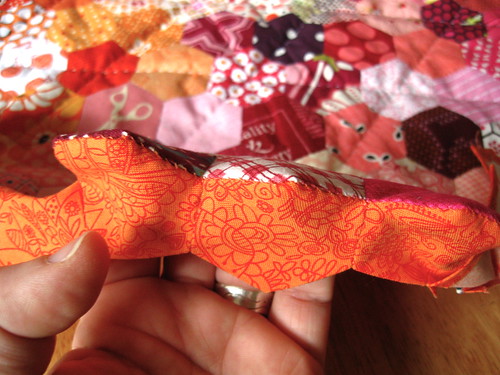
And, lastly I stitched the other edge of the hexies down.
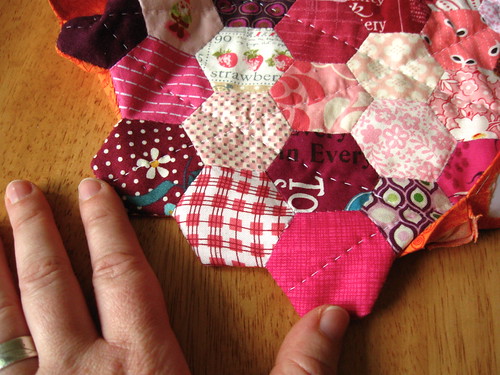
Here is a sneak peek at the front of the quilt with the uneven edge. The quilt is drying now (after I washed all of that starch out). I'll put a finished photo up soon.
22 comments:
Wow that's a lot of work, but I bet it looks great. You're always going to love that you took that extra time for the Henie border on the back!!!
oh boy! i can't wait to see the finished piece. so pretty already...loving it.
That is awesome! I did wonder how that would be done. It looks beautiful :)
It looks wonderful and I can't wait to see the grand reveal!
That's a really neat way to finish the edges. I'm looking forward to the big reveal!
Goodness, that's a lot of work but I can't wait to see the entire quilt. I'm sure it's spectacular. You've inspired me to pull out my hexies and work on them but I think mine are destined for a pillow.
I can't wait to see it! All the extra time and care will be well worth it! Thanks for showing how you did it.
cool - what a great idea! I don't have the patience for EPP, but I can't wait to see your quilt - looks beautiful.
Dang. Talk about a labor of love!!! It's beautiful.
Beautiful! I love that finish!!
It looks great, Melinda! Well worth that extra time and effort to achieve the look you want. Can't wait to see the whole thing!
So cool! In the end, this quilt will be 100% handwork? I can't wait to see the whole thing - it may motivate me to pick up my big stack of hexagon blocks.
Melinda, this is gorgeous!! I'm so excited to see the finished product!
Genius! I don't have the patience but I have the appreciation! Good job.
oh melinda... this is going to be so amazingly fabulous!
i love that you have put so much thought and love and time into this project! it is going to be absolutely perfect!!
I love this way of finishing hexie quilts. I just cut all my boarders too. But I have look forward to the boarders but it is a long way off.
This is amazing. Great job!
you are just fabulous!
Thank you! Great photos! :)
Great post, great photos! I am finishing my first small hexie quilt, and I've been wondering how to finish the edges. I think I like your version best. Thanks so much for sharing and documenting what you did!
Hello! I don't know if you are still reading comments, but I wanted to let you know that I came across your instructions on Pinterest and used them on a miniature (1/2") hexagon quilt. I have written about it on my blog here:
http://heideradieschen.blogspot.de/2017/06/mini-hexagons-10-finished.html
Thank you for sharing this with the Internet; great photos and very easy to understand.
Thanks for sharing this idea.
Post a Comment
You are awesome! Thanks for leaving a comment :)